

7 Steps to Custom Made Dentures by DenturePoint
At DenturePoint I will always give you honest opinion as to whether you really need a new set of dentures or not. If your existing dentures function satisfactorily, but you think you would like a new set, we will discuss all the points that you dislike about your current dentures and consider the best option available. It could be that your dentures only need a good clean up and a bit of high polish to return them to their original condition.
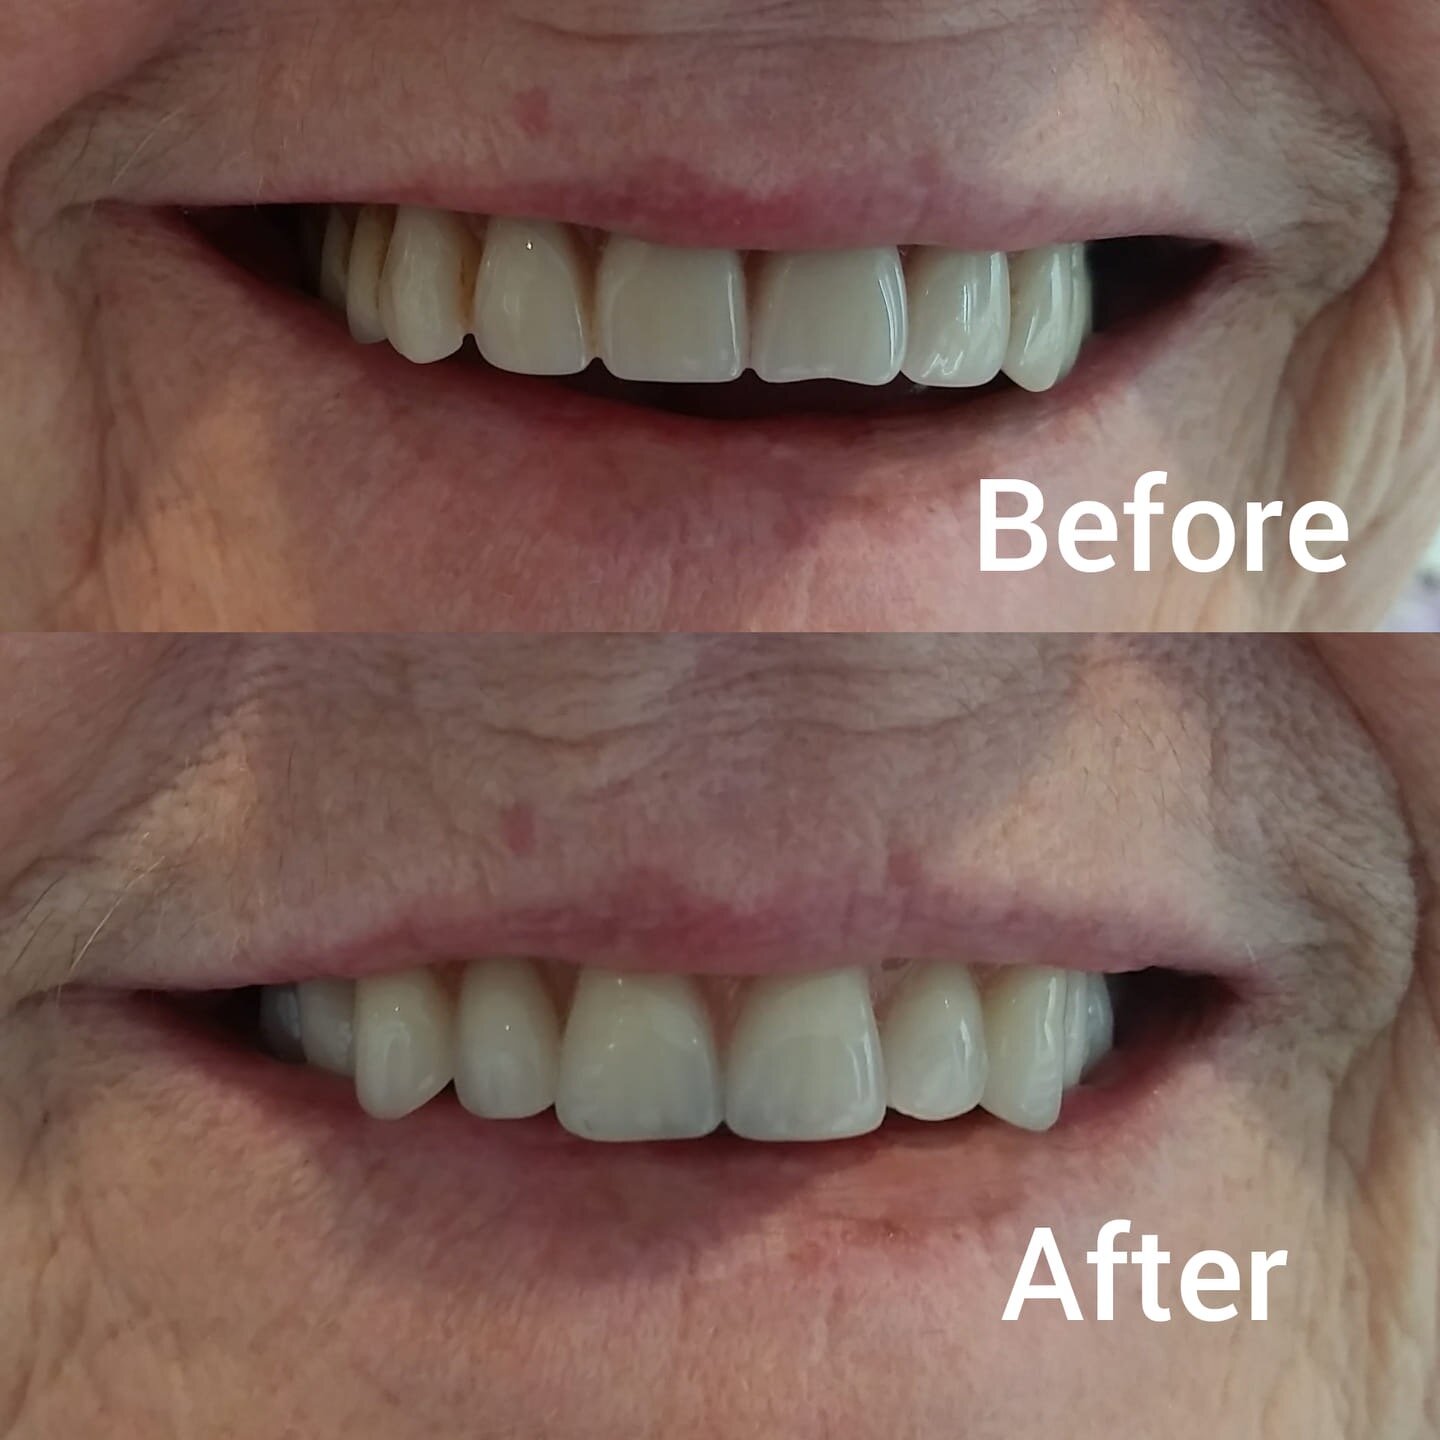
I pride myself in making aesthetically pleasing, comfortable and functional dentures. You must look good with your dentures, feel comfortable with them and they must function and serve you well. I guarantee you will love your new dentures!
At DenturePoint, I discuss every stage of making your denture with you. We make decisions together and I listen very carefully to your wishes and expectations, making adjustments until you are completely satisfied.
Making new dentures will require several appointments.
Appointment 1: We will discuss your existing dentures and focus on your expectations for new dentures. At this appointment, I will take the first impression, allowing me to get a primary mould and cast of your mouth.
Appointment 2: In order to make perfectly fitting dentures, good impressions are essential. I will take a much more accurate mould of your mouth using custom made special trays. These trays are made using primary casts and fit your mouth much better than the stock trays initially used.
Appointment 3: Today I will take lots of measurements of your face to get the optimal aesthetic and function for your new dentures. We will decide how much smile you would like to show, where to place your front teeth and other aesthetic considerations. We also choose the colour, shape and size of your teeth. It would be great if you can bring your photos showing your smile to this appointment and tell me more about your expectations. You are welcome to bring a friend or partner to assist in your decision making. We will discuss how your front teeth can support your upper lip and give you a natural, smooth look, reducing unwanted wrinkles. Finally we will record your new bite to which we will set your teeth.
Appointment 4: Try-in stage. This is a very exciting appointment. You will finally be able to see your new smile! The teeth are temporarily set in wax so if any changes are needed they can easily be moved around. Today I will also check phonetics; that is, how you talk and sound with your new dentures.
Appointment 5: Re-try. If there were lots of changes after the last appointment, sometimes more complex changes may be needed and re-fitting is required. Principally this appointment is for you to make sure you are 100% satisfied and your new dentures look very natural and life-like. Afterwards I can complete any last adjustments.
Appointment 6: Insert. The wax is converted into acrylic and I will fit the final denture at this appointment. I will check for pressure points and complete any final adjustments necessary. Now you are ready to show off with your new, beautiful smile!
Appointment 7: A follow up appointment: I would like to see you after a week to check how you are getting on with your new dentures. Anything can be adjusted, so please do not be worried. Just call me with your concern and I will happily look after your dentures.
I am always glad to see you again even if you just pop in to say a quick ‘hello’!
I know the denture process may sound complicated, but in fact it is quite a simple procedure and the final result is worth all the effort and care taken.
Please remember that if you need new dentures at short notice I am able to give you two appointments each day to speed things up for you. Just talk to me and we will come up with the best solution for you!

DenturePoint instructions on how to look after your mouthguard and/or nightguard
DenturePoint instructions on how to look after your mouthguard and/or nightguard.

First things first:
What is a difference between a mouthguard and a nightguard?
A mouthguard also known as a sportsguard is an important piece of equipment for safeguarding your teeth - protecting them from breaking or chipping. It will also prevent damage to the soft tissue of the jaw.
A nightguard - is a dental protector for night time teeth grinding and clenching. Teeth grinding is also known as bruxism.
Keeping your mouthguard and nightguard clean is essential.
If you don't give your mouthpiece proper attention, it won't take long for it to become unhygienic, quite smelly and unsightly. If you take a proper care, on the other hand, it will last you a lot longer.
Here is a list of DO's and DON'T's that will ensure your guard's peak performance.
- Rinse it off with water.
Always clean your appliance after every time you wear it. If you have no time to scrub it just rinse it off with tap water after every use. Dental plaque and debris may accumulate during prolong wear. - Scrub it.
Scrub it with a bit of toothpaste and your toothbrush on regular basis, ideally after every use. - Keep it dry.
After scrubbing let it dry out thoroughly. If you don't, it can become an active breeding ground for bacteria. - Soak it.
A number of manufacturers make products for cleaning dentures and orthodontic retainers which produce an effervescent effect and through bubbling the appliances get cleaned. You can use those products for your mouthguards and nightguards once a month for a more thorough clean. - Maintain it.
Keep it in a hard ventilated case when not used. The hardness of the case will protect it from physical damage and the ventilation holes will allow it to dry out thoroughly between each use.
OTHER:
- Keep it away from heat - do not allow your guard to sit in direct sunlight or be immersed in very hot water.
- Do not chew on your guard - this is a bad habit . Damage through chewing may compromise the level of protection the guard should provide.
- Do not make any changes yourself. If it’s uncomfortable please take it back to your dental prosthetist and they will fix it for you at no charge.
- Do not drink any coloured drinks such as Cola or tea while wearing your guard. Do not smoke. Those activities may stain your guard. Also any sugary drinks and foods should be avoided or you will be exposing your teeth to an increased risk of cavities.
- And last but not least: keep your guard away from your dog. The dogs get attracted by the smell of your guard and if left within their reach they will instantly change it into an expensive chew toy.
WHEN TO GET A NEW GUARD?
- Please inspect your mouthguard and nightguard regularly. If you discover any unwanted changes you might need to have a new one made. They should be replaced annually but children with a mixed dentition - teeth still growing - might need a replacement more often. A custom made and fit mouthguard should stay snug and secure around your teeth.
The general rule of thumb is that if it's not sitting in your mouth securely, it's not protecting you. - For nightguards we recommend a replacement every 3-5 months depending on how heavy a night grinder you are.
REMEMBER: Cleaning your nightguard or mouthguard should never be neglected! Keeping bacteria and fungi from growing on your dental appliances will also keep them from entering your body and affecting your health!
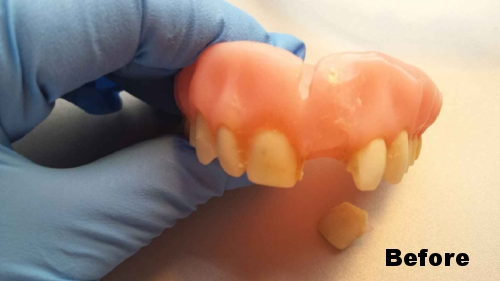
Basic Step by Step for a Broken Denture
Do not make the mistake of waiting to have your dentures repaired!
Even if it’s just a loosened part or hairline crack in your denture, do not brush it aside as a small issue. Many denture wearers ignore or delay smaller repair works only to find the damage become more difficult – and expensive – to fix later on.
Resist the temptation to fix your denture yourself with the help of a DIY kit. It is important to understand that most commercial glues are not effective or safe to use to repair dentures. The way we repair dentures is to remove a small section of the denture base material and reapply a new section. The acrylic that your denture is made from bonds readily to itself, but commercially available glues are not effective or safe to use in your mouth.
Step by step for a broken denture
First of all - don’t panic!
Collect all the pieces and check if they go back together.
Put all the pieces in a plastic bag.
Call DenturePoint on 0400919513 and tell us how the denture broke.
We will then arrange the time for a pick up and look after the rest making sure you are going to get your repaired denture as quick as possible.
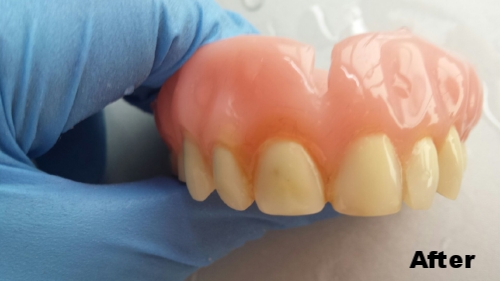


Mornington Peninsula Magazine, October 2016

Keep on smiling
It’s Maggie Murch’s mission to make sure denture wearers always have something to smile about.
“I love the idea of 24/7 denture repairs as you never know when disaster is going to strike.”
So if denture disaster strikes you, don’t worry - Maggie will soon have you smiling again.
DENTUREPOINT
M: 0400 919 513
W: denturepoint.com.au
